Pages

Showing posts with label Brass Breech. Show all posts

Wednesday, January 25, 2012

Nerf Stampede "Brass Breech" Mod Guide!

This mod guide will look into my "Brass Breech" modification for the Nerf Stampede.

Introduction:

The stock stampede plastic breech does not have an air-tight bolt to barrel seal, hence the plastic bolt itself is essentially the barrel. Once the foam dart is fired out the bolt, the foam dart already starts losing power and velocity. In addition, most of the air pressure from the plunger is wasted once the foam dart leaves the bolt.

The design objective of an air-tight brass breech system is to create a 100% air-tight seal all the way from the plunger through to the barrel, thereby providing efficient air pressure delivery to propel the foam darts further.

This would result in more power within each shot, with greater firing distance and faster dart velocity.

For a Stampede brass breech to work, it requires the air-tight connection of matching brass tubes and a guide cover to ensure that all the moving parts are aligned properly.

My design is optimized to work with stefans (short length customized foam darts), although it could be adapted to use normal length foam darts, they usually wouldn't perform as accurately or consistently, and may result in much higher rates of jams.

The following guide will cover my customized version of the "Brass Breech" mod.

Credits:

My brass breech design for the Stampede is based on the excellent "PVC guide cover" design by Oxymoron at the OzNerf forum, full credit goes to him for that design.

Link to the original "Oxy's Stampede Breech" thread by Oxymoron at the OzNerf forum.

Important Note:

The "Brass Breech" mod is a more advanced mod project that should only be performed by those who are already familiar with modding the Stampede.

For new modders, please refer to my Nerf Stampede Mod Guide to get familiar with the modding basics first.

Disclaimer: Modify at your own risk. Modifications may wear out or damage your blaster. Please be careful when using hobby tools!

Lets start...

Step 1: You will need to obtain 3 different sizes of brass tubes (Brand: K&S Engineering) and a suitable PVC pipe for nesting them into.


The brass tube sizes are: 1/2", 17/32" and 9/16". All of them are 0.014" wall thickness. They are usually supplied at hobby shops in either 1 ft or 3 ft length tubes.

I use a 13mm SingaPlastics brand PVC pipe which can nest the 9/16" brass tube. This pipe will be used to create the PVC guide cover.

Note that the inner diameters (ID) of PVC pipes often tend to have variations, even within the same length of pipe, so you have to test different sections and make sure it fits the brass tubes before usage.

Its recommended to prepare and polish the brass tubes with some metal polish to remove any oxidization that may have occurred both externally and inside the tubes, this helps smoothen out the surfaces for lower friction and better fit.


As you can see, the brass tubes nest perfectly within each other and they all form an instant 100% air-tight seal. Those who have worked with brass breech systems will be very familiar with this unique characteristic. :)


Step 2:

Lets start with the PVC guide cover, this is the most essential part of the Stampede brass breech system. The guide cover ensures that the moving brass bolt chambers each foam dart into the barrel properly and consistently.

Take the PVC pipe and mount the N-Strike clip on it.


Use a marker to trace the outline of the clip's shape.


Use a Dremel with cut-off wheel to cut out the traced lines.


As the top section of the guide cover ends up being a rather thin strip of PVC (which will tend to flex too much), i cut out another shaped part from a larger 16mm SingaPlastics brand PVC pipe which is then glued on the top to further reinforce and stiffen that section.


The PVC guide cover is done!


Step 3:

Now we proceed on to the brass barrel section.

In my example, i use a 21 cm length (8+ inch) of 9/16" brass tube as the barrel. It is nested and glued into the PVC guide cover.


Use a Dremel with sanding bit to bevel the inner edges of the brass barrel, this creates a funnel design to enable smoother chambering of the foam darts and brass bolt.


I positioned the barrel and guide cover assembly to align with the internal dimensions of the Stampede, an additional PVC pipe was nested at the front of the barrel to help keep it in line with the Stampede's front casing structure piece.

The orange collar piece is also positioned and glued to the PVC guide cover to establish a fixed securing point to the blaster casing.


The brass barrel section is done!


Step 4:

Next we proceed to the brass bolt section.

Use a pipe cutter to cut away the stock plastic bolt, as shown in this photo.


To make the brass bolt parts, use a Dremel to separately cut out a set of brass tube sections in the following lengths:

1/2" brass tube: 11 cm
17/32" brass tube: 2 cm (2 x spacer sections)
9/16" brass tube : 9 cm

These are my custom tube measurements for the Stampede brass breech system.

These measurements need to be as accurate as possible. Any variations may affect the overall structure and air seal of the breech system.


Used a Dremel with sanding bit to bevel the outer edges of the brass bolt front section, this will help to further enable smoother chambering of the foam darts and brass bolt into the brass barrel.

Here is my Nested Brass Tubes Cut-Away Diagram:


Nest the assembled brass bolt into the plunger casing.

Use the strongest glue you can get to glue everything together. I use "Selleys Super Strength" 2-part slow-curing epoxy glue (curing time of 3 days!). Make sure the glue cures completely for maximum bond strength.


Note that the 1/2" brass tube acts as the air channel and helps to reduce dead space, but not too much to create an air restriction.

The 17/32" brass tube will chamber the foam dart and connect into the 9/16" brass barrel, this is what creates the 100% air seal.

The brass bolt section is done!


Step 5:

Sleeve the brass bolt into the PVC guide cover. Test the parts movement and connection with the brass barrel.


The brass bolt must be able to move smoothly within the PVC guide cover without resistance.

If there is resistance, use a Dremel with sanding bit to widen the inner diameter (ID) of the PVC guide cover until it fits.

When the 17/32" brass bolt connects into the 9/16" brass barrel, it should have a 100% air-tight seal. Test the seal by closing the breech, then manually compressing the plunger while blocking the barrel exit, there should be resistance felt in the plunger rod.

Next, install all the parts into the Stampede.


Test the parts fit and test the movement of the brass bolt. Make sure everything moves smoothly.

If there are parts which encounter resistance, either loosen or trim the fit and test again.


Assemble everything together, keep testing the movement of the parts as you assemble the blaster.


Its completed!

Here are some close-ups of the breech system:
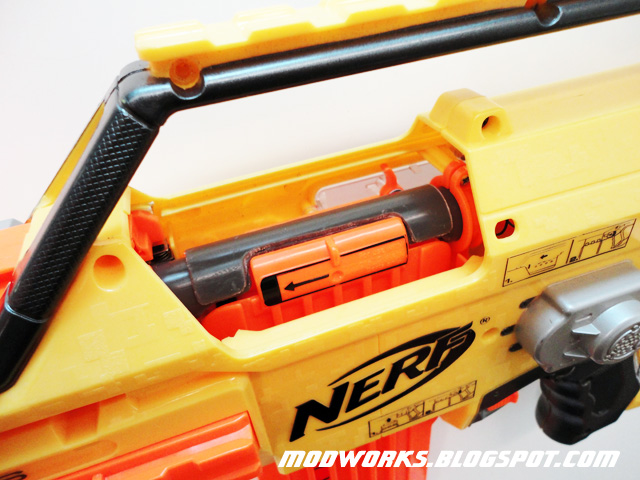


Awesome!

Stampede Brass Breech - Demo & Test Fire Video:


Sample Test Fire Results:

PTG: Parallel-To-Ground (Shoulder height, no elevation)
ATG: Angled-To-Ground (Aimed higher, 30 degrees elevation)

Distance is measured at where the dart lands (Average of 6 darts).

Brass Breech Stampede (9kg Load Spring)
Ammo: Customized FBR foam + 1.1 gram soft silicone tip weight
PTG = 95-105 ft
ATG = 120-130 ft

Note that the test was done indoors with customized foam darts and the results are sample estimates for reference (your results may differ depending on materials and mod techniques used).


Important User Tips:

- Short length customized stefans work best with this breech system, make sure that the stefans used are in perfect condition and fit the brass barrel properly (not too narrow or not too wide). In addition, ensure that the back portions of the stefans are rounded without any excess foam sticking out which might get clipped by the brass breech when it closes. Taking care of these various factors will greatly reduce the chances of jamming.

- With the clip and trigger locks removed, do not put your fingers into the breech section when the blaster is in operation, as this can result in injuries.

- The better the foam dart fit in the brass barrel, the better the range results.


Variants:

For fans of minimized Stampedes... check out the brass breech mod done on my "SMG" Variant!


Note the extra length of PVC pipe and coupler covering the brass barrel in front, it is designed to cover the brass tube edges for safety in Nerf games. :)

Check it out in action!


Thursday, August 5, 2010

Brass Barrel Slide Breech - Build Guide!

For users of modified or custom-built single-shot blasters that require manual reloading, the usual basic methods of loading foam darts is to either use "speedloaders" (a cluster of individual barrels attached together) or using a stick to ram-rod individual foam darts into a barrel... both being rather slow and tedious procedures.

A popular alternative is to use slide breeches.

Many slide breech designs have been created by various modders over the years and slide breeches are usually installed into single-shot manual-reload blasters to offer a quicker (and more elegant) dart reload solution.

I've tinkered with a few slide breech designs and eventually came up with a customised design which uses 9/16" brass tubes (my favourite barrel material and dimension of choice, as it fits the custom foam darts i use perfectly) nested within 13mm locally-sourced PVC pipe (which allows wide compatibility with all my modded and custom built blasters).

In addition, i have also designed an in-built brass barrel "secure-join" system which ensures a 100% air-tight seal.

Here is how i built my custom Brass Barrel Slide Breech:


Step 1: Prepare 1ft length of 9/16" brass tube (Brand: K&S Engineering) and 40cm length of 13mm SingaPlastics PVC pipe.

The 9/16" brass tube nests within the 13mm SingaPlastics PVC pipe.

Note that the PVC pipe internal diameters (ID) can vary depending on production batch and sometimes it can be too tight or too loose for the brass tube (even within the same length of pipe), therefore you'll need to test the nesting fit using different sections of pipe beforehand to get the best fit combination for smooth breech operation.


Step 2: Use a Dremel with a cutting disc designed for cutting plastic, along with a grinding bit to cut and trim a suitable sized breech channel in the 13mm PVC pipe, make sure the channel is long and wide enough to fit foam darts.

Include a semi-circle cut at the back of the breech channel for the breech locking tab.


Step 3: Put aside the PVC breech for now. We shall move on to the brass barrel section.

To create the brass barrel "secure-join" system, cut 3 x 2cm sections of 1/2", 17/32" and 9/16" brass tubes.

Nest all 3 brass tube sections within each other with the 1/2" and 17/32" sections positioned forward slightly. Glue the sections together with strong 2-part epoxy glue.

The 1/2" section will help push the foam dart forward into the barrel and the 17/32" section will sleeve with the 9/16" brass barrel. This forms the basis of the brass barrel "secure-join" system.

In the photo below, you can see how the system works. When the breech is closed, the 9/16" brass barrel will sleeve onto the nested brass tube assembly to create a 100% air seal.


Step 4: Install the brass tube assembly into the back of the breech channel, position it so that the brass barrel can sleeve on it when the breech is closed. Use 2-part epoxy glue to permanently attach it.

Done properly, a nice audible "click" can be heard when the brass barrel and tube assembly connect.


Step 5: Attach a breech locking tab onto the brass barrel.

In my example, i simply used 2 x hex nuts stacked up and epoxy glued onto the brass barrel. I use Selleys Super Strength 2-part epoxy glue (properly clamped with 72 hour curing time), as i've found that its the only epoxy glue strong enough to still hold the locking tab permanently even after repeated heavy-duty usage.

The breech locking tab is important because it prevents the brass barrel from slipping out of the PVC breech casing, and when the breech is closed, it ensures a secure air-tight connection and seal.

In the photo below, it shows the breech open (top), breech closed (middle) and breech locking tab engaged (bottom).


Step 6: Attach the completed Brass Barrel Slide Breech to your blaster of choice.

Here is an example of how i attached it to my +bow.

I customised a 13mm PVC adapter with PETG tube rings to match the +bow coupler.


Then i joined the Brass Barrel Slide Breech with the custom 13mm PVC adapter using a straight 13mm PVC pipe connector.


Great performance and a much smoother (and cooler looking) foam dart reloading procedure. :)

Sunday, July 25, 2010

Nerf Longshot "Brass Breech" Mod Update!

This is an update to my Nerf Longshot "Brass Breech" Mod Guide.

Mod Guide Link: http://modworks.blogspot.com/2010/03/nerf-longshot-brass-breech-mod-guide.html

One of the issues with that brass breech design was that the brass barrel half-pipe prevents clips from being loaded when the breech is open, due to the width of the half-pipe.

From a modding suggestion by "phuonguyen" over at the OzNerf forum a while back, the idea of a thinner "quarter-pipe" for the brass barrel was hatched. Credit goes to phuonguyen for his idea.

So i made a brass barrel with the quarter-pipe design, and it worked perfectly!

Basically just cut a quarter-pipe into the brass barrel.


Then just install it into the Brass Breeched Longshot as per normal.


The above photo shows the brass barrel with quarter-pipe installed in a Longshot with the original angel breech bolt attachment design.

Note that if you are following my additional brass bolt half-pipe design, you'll also have to do the quarter-pipe technique on the brass bolt too, so that both parts will have quarter-pipes to line up nicely for clips to be loaded and unloaded properly.

Now you can load and unload clips when the brass breech is open! :)

Thursday, April 15, 2010

Nerf Recon "Brass Breech" Mod Guide!

Due to popular requests, here is a mod guide for the "Brass Breech" modification for the Nerf Recon.

This mod is also applicable to other Nerf N-Strike blasters with reverse plunger setups (ie. Raider, Deploy, Longstrike, Alpha Trooper etc).

Background:

For a background of what a Brass Breech is and what it does, please refer to the Longshot "Brass Breech" Mod Guide.

Introduction:

This mod guide will look very similar to the Longshot "Brass Breech" Mod Guide as they follow a similar modding process, but there are some specific differences in parts measurements, positioning and fit that modders will have to take note of.

To establish expectations, due to the smaller reverse plunger setup in Recons (or any of the other reverse plunger blasters), the potential performance gains will naturally be much less significant than in a Longshot.

Important Note:

The "Brass Breech" mod is a more advanced mod project that should only be performed by those who are already familiar with modding the Recon.

For new modders, refer to the Nerf Recon Mod Guide to get familiar with the modding basics first.

Disclaimer: Modify at your own risk. Modifications may wear out or damage your blaster. Please be careful when using hobby tools!

Lets begin...

Step 1:

You will need to obtain 4 different sizes of brass tubes (Brand: K&S Engineering).

The brass tube sizes are: 1/2", 17/32", 9/16" and 19/32". All of them are 0.014" wall thickness. They are usually supplied at hobby shops in either 1 ft or 3 ft length tubes.

Oxidization tends to occur in store bought supplies, so give the brass tubes a good polish with some Brasso Metal Polish, polish both externally and inside the tubes, this helps smoothen out the surfaces for lower friction.


Step 2:

We will work on the barrel and bolt receiver first.

In this example, i'm using 7" of 9/16" brass tube for the barrel.

Take a Rotary Tool with a cutting wheel, and cut a 7.5 cm length bolt receiver half-pipe in the 9/16" brass tube. The effective barrel length will be 4".

Use a sanding bit to round out the edges and corners.

Please be careful when handling such hobby tools, wear protective eyewear, dust masks and gloves.


Step 3:

To help the chambered darts achieve an even tighter air seal, make tightening rings in the barrel.

Use a Rotary Pipe Cutter and create the tightening rings. Just tighten the pipe cutter slightly around the brass tube, then rotate. Do it a few times to create the tightening rings.


Okay, that's all for the brass barrel and bolt receiver, you can put it aside for now.


Step 4:

We will now go on to the bolt section of the breech.

Separately cut out a set of brass tube sections in the following lengths:

1/2" brass tube: 10.5 cm
17/32" brass tube: 3 cm
9/16" brass tube : 2 cm
19/32" brass tube : 14 cm (4 cm for bolt half-pipe)

These are my custom tube measurements for a breech system for the Nerf Recon that can chamber standard-sized darts. In addition, it also features a more secure "half-pipe" bolt attachment point design.

The measurements need to be as accurate as possible. Any variations may affect the overall structure and air seal of the breech system.


Step 5:

Cut the original stock plastic bolt at the section shown below.


Nest all the 4 brass sections for the bolt completely into the plastic bolt end-piece.

Here is my Nested Brass Tubes Cut-Away Diagram for the Nerf Recon:


Use the strongest glue you can get to glue everything together. I use slow-curing 2-part strong epoxy glue. Make sure the glue cures completely for maximum bond strength.

Completed nested brass bolt assembly.


Nested brass bolt internal assembly.


Step 6:

We will now need to do a test alignment of the various components.

Secure the brass barrel inside the original orange plastic barrel by wrapping it with electrical or duct tape to temporarily widen it's outer diameter, so that the brass barrel can be wedged tightly inside the plastic barrel, yet still movable to allow adjustments for test fittings.

Check all the part positions and make sure that a clip with a standard-sized dart can fit nicely into the breech opening.

Note that the 19/32" brass bolt half-pipe will slide over the 9/16" brass barrel half-pipe, which in turn slides into the brass bolt assembly.


Step 7:

To attach the brass bolt to the bolt sled, we will need to cut out the attachment piece from the original plastic bolt.

Position the brass bolt, attachment piece and bolt sled in the casing and note the maximum forward and backward movement of the bolt to find the correct point to attach the plastic attachment tip to the brass bolt.

Note that a segment of plastic behind the attachment point has to be trimmed thinner so that it can slide into the plunger casing properly. Just whittle it down until it fits.

Use some sandpaper to roughen the surfaces on the plastic attachment tip and brass bolt, then use the strongest glue you can get to glue the 2 parts together. Again, i use slow-curing 2-part strong epoxy glue here too. As always, make sure the glue cures completely for maximum bond strength.

This is the section that has to take the most load, especially when stronger springs are used.


Step 8:

Assemble everything together into the casing, note that the pop-up blocker plate mechanisms are all removed, we don't need those anymore.


Step 9:

Test your "Brass Breech" Recon!

Breech open.


Breech closed.


Once you are confident that everything works properly, you can then proceed to permanently glue the brass barrel inside the orange plastic barrel. DIY some plastic spacer rings along the brass barrel to keep it centered within.

Its complete!


Sample Test Fire Results:

PTG: Parallel-To-Ground (Shoulder height, no elevation)
ATG: Angled-To-Ground (Aimed higher, 30 degrees elevation)

Distance is measured at where the dart lands (Average of 6 darts).

Brass Breech Recon (11kg Load Spring)
Ammo: Customized FBR foam + 1.1 gram soft silicone tip weight
PTG = 70 ft
ATG = 90 ft

Note that the test was done indoors and the results are sample estimates for reference (your results may differ depending on materials and mod techniques used).


Important Usage Tips:

- Clips must be loaded only when the breech closed. This is so that the clip feed-lips can "catch" around the brass bolt for a proper fit.

- For smooth dart chambering process, make sure that foam darts used are no more than 7 cm in length.

- The better the foam dart fit in the brass barrel, the better the range results.

- Due to the smaller air volume of the Recon reverse plunger, using longer barrels may cause the foam darts to get stuck as it doesn't have enough power to propel them out. If that occurs, reduce the barrel length and test again.

Tuesday, March 23, 2010

Nerf Longshot "Brass Breech" Mod Guide!

This mod guide will look into my "Brass Breech" modification for the Nerf Longshot.

It is based on the original "Angel Breech" design.

Background:

Just a quick background on the origins of this breech design, the original "Angel Breech" design was created by forsaken_angel24, and he posted his guide on how to make his original version on the NerfHaven forum.

Link to the original "Angel Breech" Mod Guide by forsaken_angel24.

Full credit goes to forsaken_angel24 for his original breech design!

Introduction:

The stock Longshot plastic breech does not have an air-tight bolt to barrel seal, hence the plastic bolt itself is essentially the barrel. Once the foam dart is fired out the bolt, the foam dart already starts losing power and velocity. In addition, most of the air pressure from the plunger is wasted once the foam dart leaves the bolt.

The design objective of an air-tight brass breech system is to create a 100% air-tight seal all the way from the plunger through to the barrel, thereby providing efficient air pressure delivery to propel the foam darts further.

This would result in more power within each shot, with greater firing distance and faster dart velocity.

The "Angel Breech" was originally designed to chamber shorter foam darts (commonly called "Stefans", DIY foam darts made from foam backer rod).

I have tinkered with the part dimensions and worked out a new set of measurements to allow the "Brass Breech" system to chamber standard-sized foam darts too.

In addition, i've added a "bolt half-pipe" design into the breech system to create a larger adhesive contact area for the bolt sled attachment piece, creating a much stronger attachment point (very essential for Longshots using stronger springs).

The following guide will cover my customized version of the "Brass Breech" mod.

Important Note:

The "Brass Breech" mod is a more advanced mod project that should only be performed by those who are already familiar with modding the Longshot.

For new modders, please refer to the Nerf Longshot Mod Guide to get familiar with the modding basics first.

Disclaimer: Modify at your own risk. Modifications may wear out or damage your blaster. Please be careful when using hobby tools!

Lets start...

Step 1: You will need to obtain 4 different sizes of brass tubes (Brand: K&S Engineering).

The brass tube sizes are: 1/2", 17/32", 9/16" and 19/32". All of them are 0.014" wall thickness. They are usually supplied at hobby shops in either 1 ft or 3 ft length tubes.

Oxidization tends to occur in store bought supplies, so give the brass tubes a good polish with some Brasso Metal Polish, polish both externally and inside the tubes, this helps smoothen out the surfaces for lower friction.

Shiny things are always nice and it'll give your blaster some "bling" too! :)


Step 2: We will work on the barrel and bolt receiver first.

In this example, i'm using 1 ft of 9/16" brass tube for the barrel.

Take a Rotary Tool with a cutting wheel, and cut a 8 cm length bolt receiver half-pipe in the 9/16" brass tube.

Use a sander bit to round out the edges and corners.

Please be careful when handling such hobby tools, wear protective eyewear, dust masks and gloves.


Step 3: To help the chambered darts achieve an even tighter air seal, make tightening rings in the barrel.

Use a Rotary Pipe Cutter and create the tightening rings. Just tighten the pipe cutter slightly around the brass tube, then rotate. Do it a few times to create the tightening rings.


Okay, thats all for the brass barrel and bolt receiver, you can put it aside for now.


Step 4: We will now go on to the bolt section of the breech.

Separately cut out a set of brass tube sections in the following lengths:

1/2" brass tube: 11 cm
17/32" brass tube: 2 cm
9/16" brass tube : 2 cm
19/32" brass tube : 17 cm (5.5 cm for bolt half-pipe)

These are my custom tube measurements for a breech system that can chamber standard-sized darts. In addition, it also features a more secure "half-pipe" bolt attachment point design.

The measurements need to be as accurate as possible. Any variations may affect the overall structure and air seal of the breech system.


Step 5: Cut the original stock plastic bolt until around 1 cm of the plastic bolt is left.


Nest all the 4 brass sections for the bolt completely into the plastic bolt end-piece.

Here is my Nested Brass Tubes Cut-Away Diagram:


Use the strongest glue you can get to glue everything together. I use "Selleys Super Strength" 2-part slow-curing epoxy glue (and it actually requires a curing time of 3 days!). Make sure the glue cures completely for maximum bond strength.

Completed nested brass bolt assembly.


Nested brass bolt internal assembly.


Test fit the bolt section with your barrel and bolt receiver, place a dart into the breech system to test the dart fit too.


Step 6: Once the brass bolt sections are permanently attached, fill up the deadspace in the plastic bolt end-piece hollow space with hotglue (or any other suitable filler material).


Step 7: We will now need to do a test alignment of the various components.

Secure the brass barrel inside the original orange plastic barrel by wrapping it with electrical or duct tape to temporarily widen it's outer diameter, so that the brass barrel can be wedged tightly inside the plastic barrel, yet still movable to allow adjustments for test fittings.

Check all the part positions and make sure that a clip with a standard-sized dart can fit nicely into the breech opening.

Note that the 19/32" brass bolt half-pipe will slide over the 9/16" brass barrel half-pipe, which in turn slides into the brass bolt assembly.


Step 8: To attach the brass bolt to the bolt sled, we will need to cut out the attachment piece from the original plastic bolt.

Position the brass bolt, attachment piece and bolt sled in the casing and note the maximum forward and backward movement of the bolt to find the correct point to attach the plastic attachment tip to the brass bolt.

Note that a segment of plastic behind the attachment point has to be trimmed thinner so that it can slide into the plunger casing properly. Just whittle it down until it fits.

Use some sandpaper to roughen the surfaces on the plastic attachment tip and brass bolt, then use the strongest glue you can get to glue the 2 parts together. Again, i use slow-curing 2-part strong epoxy glue here too. As always, make sure the glue cures completely for maximum bond strength.

This is the section that has to take the most load, especially when stronger springs are used.


Step 9: Assemble everything together into the casing, note that the pop-up blocker plate mechanisms are all removed, we don't need those anymore.


Step 10: Test your "Brass Breech" Longshot!

Breech open.


Breech closed.


Ready to go!


Nice and shiny! :)


Sample Test Fire Results:

PTG: Parallel-To-Ground (Shoulder height, no elevation)
ATG: Angled-To-Ground (Aimed higher, 30 degrees elevation)

Distance is measured at where the dart lands (Average of 6 darts).

Brass Breech Longshot (14kg Load Spring)
Ammo: Customized FBR foam + 1.1 gram soft silicone tip weight
PTG = 110-120 ft
ATG = 140-160 ft

Note that the test was done indoors with customized foam darts and the results are sample estimates for reference (your results may differ depending on materials and mod techniques used).


Average Shot Velocity Measurement From Shooting Chrony F-1:

FPS data are from an average of 12 recorded shots.
All test shots are fired with the blaster barrel muzzle approx. 6 inches from the 1st sensor.
Tests are done indoors with natural light sources.


Important User Tips:


- Clips must be loaded only when the breech closed. This is so that the clip feed-lips can "catch" around the brass bolt for a proper fit.

- For smooth dart chambering process, make sure that foam darts used are no more than 7 cm in length.

- The better the foam dart fit in the brass barrel, the better the range results.

Enjoy!