This mod guide will look into my
"Brass Breech" modification for the
Nerf Longshot.
It is based on the original "Angel Breech" design.
Background:
Just a quick background on the origins of this breech design, the original "Angel Breech" design was created by forsaken_angel24, and he posted his guide on how to make his original version on the NerfHaven forum.
Link to the original
"Angel Breech" Mod Guide by forsaken_angel24.
Full credit goes to forsaken_angel24 for his original breech design!
Introduction:
The stock Longshot plastic breech does not have an air-tight bolt to barrel seal, hence the plastic bolt itself is essentially the barrel. Once the foam dart is fired out the bolt, the foam dart already starts losing power and velocity. In addition, most of the air pressure from the plunger is wasted once the foam dart leaves the bolt.
The design objective of an air-tight brass breech system is to create a 100% air-tight seal all the way from the plunger through to the barrel, thereby providing efficient air pressure delivery to propel the foam darts further.
This would result in more power within each shot, with greater firing distance and faster dart velocity.
The "Angel Breech" was originally designed to chamber shorter foam darts (commonly called "Stefans", DIY foam darts made from foam backer rod).
I have tinkered with the part dimensions and worked out a new set of measurements to allow the "Brass Breech" system to chamber standard-sized foam darts too.
In addition, i've added a "bolt half-pipe" design into the breech system to create a larger adhesive contact area for the bolt sled attachment piece, creating a much stronger attachment point (very essential for Longshots using stronger springs).
The following guide will cover my customized version of the "Brass Breech" mod.
Important Note:
The "Brass Breech" mod is a more advanced mod project that should only be performed by those who are already familiar with modding the Longshot.
For new modders, please refer to the
Nerf Longshot Mod Guide to get familiar with the modding basics first.
Disclaimer: Modify at your own risk. Modifications may wear out or damage your blaster. Please be careful when using hobby tools!
Lets start...
Step 1: You will need to obtain 4 different sizes of brass tubes (Brand: K&S Engineering).
The brass tube sizes are: 1/2", 17/32", 9/16" and 19/32". All of them are 0.014" wall thickness. They are usually supplied at hobby shops in either 1 ft or 3 ft length tubes.
Oxidization tends to occur in store bought supplies, so give the brass tubes a good polish with some Brasso Metal Polish, polish both externally and inside the tubes, this helps smoothen out the surfaces for lower friction.
Shiny things are always nice and it'll give your blaster some "bling" too! :)
 Step 2:
 We will work on the barrel and bolt receiver first.
In this example, i'm using 1 ft of 9/16" brass tube for the barrel.
Take a Rotary Tool with a cutting wheel, and cut a 8 cm length bolt receiver half-pipe in the 9/16" brass tube.
Use a sander bit to round out the edges and corners.
Please be careful when handling such hobby tools, wear protective eyewear, dust masks and gloves.
 Step 3:
 To help the chambered darts achieve an even tighter air seal, make tightening rings in the barrel.
Use a Rotary Pipe Cutter and create the tightening rings. Just tighten the pipe cutter slightly around the brass tube, then rotate. Do it a few times to create the tightening rings.

Okay, thats all for the brass barrel and bolt receiver, you can put it aside for now.
Step 4: We will now go on to the bolt section of the breech.
Separately cut out a set of brass tube sections in the following lengths:
1/2" brass tube: 11 cm
17/32" brass tube: 2 cm
9/16" brass tube : 2 cm
19/32" brass tube : 17 cm (5.5 cm for bolt half-pipe)
These are my custom tube measurements for a breech system that can chamber standard-sized darts. In addition, it also features a more secure "half-pipe" bolt attachment point design.
The measurements need to be as accurate as possible. Any variations may affect the overall structure and air seal of the breech system.
 Step 5:
 Cut the original stock plastic bolt until around 1 cm of the plastic bolt is left.

Nest all the 4 brass sections for the bolt completely into the plastic bolt end-piece.
Here is my Nested Brass Tubes Cut-Away Diagram:

Use the strongest glue you can get to glue everything together. I use "Selleys Super Strength" 2-part slow-curing epoxy glue (and it actually requires a curing time of 3 days!). Make sure the glue cures completely for maximum bond strength.
Completed nested brass bolt assembly.

Nested brass bolt internal assembly.

Test fit the bolt section with your barrel and bolt receiver, place a dart into the breech system to test the dart fit too.
 Step 6:
 Once the brass bolt sections are permanently attached, fill up the deadspace in the plastic bolt end-piece hollow space with hotglue (or any other suitable filler material).
 Step 7:
 We will now need to do a test alignment of the various components.
Secure the brass barrel inside the original orange plastic barrel by wrapping it with electrical or duct tape to temporarily widen it's outer diameter, so that the brass barrel can be wedged tightly inside the plastic barrel, yet still movable to allow adjustments for test fittings.
Check all the part positions and make sure that a clip with a standard-sized dart can fit nicely into the breech opening.
Note that the 19/32" brass bolt half-pipe will slide over the 9/16" brass barrel half-pipe, which in turn slides into the brass bolt assembly.
 Step 8:
 To attach the brass bolt to the bolt sled, we will need to cut out the attachment piece from the original plastic bolt.
Position the brass bolt, attachment piece and bolt sled in the casing and note the maximum forward and backward movement of the bolt to find the correct point to attach the plastic attachment tip to the brass bolt.
Note that a segment of plastic behind the attachment point has to be trimmed thinner so that it can slide into the plunger casing properly. Just whittle it down until it fits.
Use some sandpaper to roughen the surfaces on the plastic attachment tip and brass bolt, then use the strongest glue you can get to glue the 2 parts together. Again, i use slow-curing 2-part strong epoxy glue here too. As always, make sure the glue cures completely for maximum bond strength.
This is the section that has to take the most load, especially when stronger springs are used.
 Step 9:
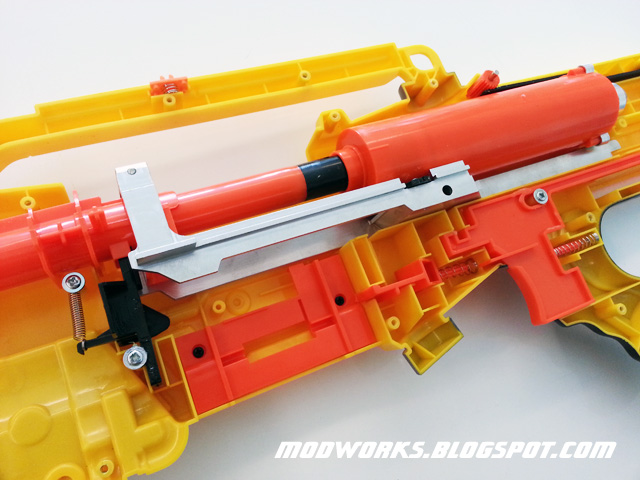
 Assemble everything together into the casing, note that the pop-up blocker plate mechanisms are all removed, we don't need those anymore.
 Step 10:
 Test your "Brass Breech" Longshot!
Breech open.

Breech closed.

Ready to go!

Nice and shiny! :)
Sample Test Fire Results:
PTG: Parallel-To-Ground (Shoulder height, no elevation)
ATG: Angled-To-Ground (Aimed higher, 30 degrees elevation)
Distance is measured at where the dart lands (Average of 6 darts).
Brass Breech Longshot (14kg Load Spring)
Ammo: Customized FBR foam + 1.1 gram soft silicone tip weight
PTG = 110-120 ft
ATG = 140-160 ft
Note that the test was done indoors with customized foam darts and the results are sample estimates for reference (your results may differ depending on materials and mod techniques used).
Average Shot Velocity Measurement From Shooting Chrony F-1:
FPS data are from an average of 12 recorded shots.
All test shots are fired with the
blaster barrel muzzle approx. 6 inches from the 1st sensor.
Tests are done indoors with natural light sources.

Important User Tips:
- Clips must be loaded only when the breech closed. This is so that the clip feed-lips can "catch" around the brass bolt for a proper fit.
- For smooth dart chambering process, make sure that foam darts used are no more than 7 cm in length.
- The better the foam dart fit in the brass barrel, the better the range results.
Enjoy!