Pages

Tuesday, September 29, 2009

Nerf Raider Mod Guide!

This Mod Guide will cover popular mods for the Nerf Raider.

Mods covered:
- Air Restrictor (AR) Removal
- Plunger Padding
- Spring Replacement

Note: These mods are also applicable to the Nerf Recon as it shares similar internal mechanisms as the Nerf Raider (some of the info here may also be repeated at the Nerf Recon Mod Guide).

>> Nerf Recon Mod Guide
>> Nerf Longshot Mod Guide

Disclaimer: Modify at your own risk. Modifications may wear out or damage your blaster. Please be careful when using hobby tools!


:: AR Removal ::

Step 1: Disassemble your Raider. Make sure to remove all the screws before detaching the casing. There are 14 screws in the main body, 5 screws in the front grip and 2 larger screws in the grey plunger cap.


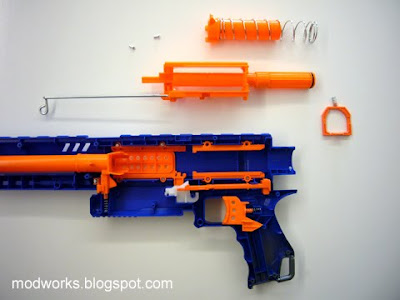
Step 2: Detach the bolt, plunger and bolt sled. Unscrew the top plunger guide rail for easier access.


Step 3: Knock out the metal retaining pin that holds the bolt and bolt sled, this will separate the bolt from the bolt sled.


Step 4: This is the "Pipe Cutter" method. You will need a rotational pipe cutter to cut the bolt in order to remove the AR.

Please observe closely the spot where the pipe cutter blade is positioned at. That is the correct position to cut (though you can deviate 1mm either way). Just tighten the pipe cutter slightly and do the rotational cut (not too much or else it might slice the bolt in half).

In the following photo, a pre-sliced cut has already been made for reference.


Rotate the pipe cutter 2-3 times, and try to pull apart the bolt. If it doesn't move, rotate the pipe cutter again, do not over-tighten the pipe cutter! Keep testing. Very soon, the bolt will separate into two parts and the AR will just drop out.


Step 5: Join back the 2 sections of the bolt sleeve using plastic hobby or epoxy glue. Let the glue set properly before re-installing back into the blaster.


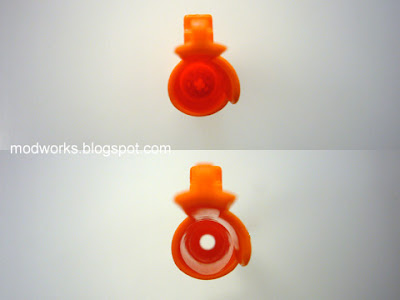
Before AR removal (top photo) & After AR removal (bottom photo).


:: Plunger Padding ::

Without the AR, there is no air buffering system to cushion the plunger on bolt impact.

This results in very high wear and tear on the plunger, by both normal firing and dry firing. Due to repeated direct impact on the bolt (hence the loud cracking sound during firing), many users of modded Raiders have experienced bolts eventually punching a hole out of the back of the plungers!

Therefore, padding should be applied to the plunger to help cushion the impact.

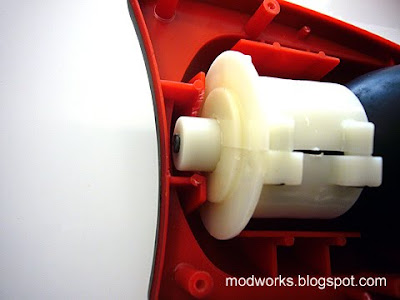
In the following photo, soft rubber padding is attached to the base of the plunger.


The 20mm diameter soft rubber pads i used in the above example are from a brand called "Volkmar-Fix", they can be found at most common hardware shops.


Make sure to only use soft rubber pads that are easy to compress, so that it can allow the bolt to move backwards fully for proper loading/unloading of magazines and chambering of darts.

Experiment with various plunger padding methods to help maintain the durability of AR removed blasters over long-term usage.


:: Spring Replacement ::

One way to increase the speed of air delivery through the bolt is to replace the stock spring with a stronger aftermarket spring.

There are many different springs with different sizes and spring force ratings. Springs can be sourced from your local spring supply shops. Spring choice will depend on your usage.

This example below shows a stock spring (top photo) vs. an aftermarket 6kg load spring (bottom photo).


Stronger springs are usually made of thicker wires. Internal casing trimming and adjustments may need to be done so that the springs have enough space to expand when compressed, for smooth firing operation.

Stock internal casing (left photo) vs. Trimmed internal casing (right photo).


Depending on the strength of the spring used, extra catch springs may also need to be added to hold the increased tension.

Note that a stronger spring will require more effort to prime the blaster before each shot, and the impact of the plunger on the bolt and overall stress on the blaster casing is also much greater. It'll be important to account for these factors when doing a spring replacement.


:: Sample Test Fire Data ::

PTG: Parallel-To-Ground (Shoulder height, no elevation)
ATG: Angled-To-Ground (Aimed higher, 30 degrees elevation)

Distance is measured at where the dart lands (Average of 6 darts).

Stock Raider
PTG = 20 ft
ATG = 30 ft

Modded Raider (AR Removal & 6kg Load Aftermarket Spring)
PTG = 50 ft
ATG = 60 ft

Note that the test was done indoors with customized foam darts. The results are sample estimates for reference (your results may differ depending on materials and mod techniques used).

Monday, September 28, 2009

Nerf Longshot Mod Guide!

This Mod Guide will cover popular mods for the Nerf Longshot.

Mods covered:
- Air Restrictor (AR) Removal
- Air Release Seal
- Plunger Padding
- Aftermarket Spring Replacement
- Deadspace Elimination
- Charging Handle Easy Release

Note: Some of the info here may also be repeated at the other Mod Guides.

>> Nerf Recon Mod Guide
>> Nerf Raider Mod Guide

Disclaimer: Modify at your own risk. Modifications may wear out or damage your blaster. Please be careful when using hobby tools!


:: AR Removal ::

Step 1: Disassemble your Longshot. Make sure to remove all the screws before detaching the casing. There are 21 screws in the main body and 7 screws in the shoulder stock.


Step 2: Take out the bolt sled assembly. Knock out the metal retaining pin that holds the bolt and bolt sled, this will separate the bolt from the bolt sled.


Step 3: Remove the plunger and just focus on the bolt assembly.

The bolt will still be inside the plunger casing (my example photo just shows a seperate bolt for clearer reference, don't remove it from the plunger casing).

Take a straight wire cutter and snap off the 3 plastic supports holding the AR structure.


Once the 3 supports are cut, the AR components will just drop out.

Here is what the bolt will look like with AR (top photo) and without AR (bottom photo).


:: Air Release Seal ::


For maximum air flow, cover the Longshot bolt's air release. You can use tape or just fill it with epoxy glue.


:: Plunger Padding ::


Without the AR, there is no air buffering system to cushion the plunger on bolt impact.

This results in very high wear and tear on the plunger and bolt casing, by both normal firing and dry firing. Due to repeated direct impact on the bolt (hence the loud cracking sound during firing). In time, the bolt and plunger may become damaged.

Therefore, padding should be applied to the plunger to help cushion the impact.

In the following photo, i simply attached custom shaped soft foam bumper padding to the base of the plunger. You can try using other cushioning materials too, just make sure the padding can compress well and covers up to the edges of the plunger base.


Note that the bolt clearance in the Longshot bolt casing is quite limited, therefore it is recommended to trim the padding thinner so that it does not interfere with the bolt travel when loading/unloading clips.


:: Aftermarket Spring Replacement ::

One way to increase the speed of air delivery through the bolt is to replace the stock spring with a stronger aftermarket spring.

There are many different springs with different sizes and spring force ratings. Springs can be sourced from your local spring supply shops. Spring choice will depend on your usage.

The examples below show a stock spring (top photo) vs. an aftermarket spring (middle photo) vs. a stock spring with aftermarket spring (bottom photo).


Stronger springs are usually made of thicker wires. Adjustments may have to be done as required for smooth firing operation.

Depending on the strength of the spring used, extra catch springs may also need to be added to hold the increased tension.

Note that a stronger spring will require more effort to prime the blaster for each shot, and the impact of the plunger on the bolt and overall stress on the blaster casing is also much greater. It'll be important to account for these factors when doing a spring replacement.


:: Deadspace Elimination ::

There is a volume of empty space within the plunger casing. For more efficient air flow, it is recommended to fill up that space to eliminate the deadspace. In this example, i use foam material shaped to fill that space.


:: Priming Handle Easy Release ::

Trim the Longshot priming handle internal catch so that it'll be easy to attach and detach it anytime for blaster maintenance and future mods.


:: Sample Test Fire Data ::


PTG: Parallel-To-Ground (Shoulder height, no elevation)
ATG: Angled-To-Ground (Aimed higher, 30 degrees elevation)

Distance is measured at where the dart lands (Average of 6 darts).

Stock Longshot
PTG = 25 ft
ATG = 35 ft

Modded Longshot (AR Removal & 14kg Load Aftermarket Spring)
PTG = 70 ft
ATG = 90 ft

Note that the test was done indoors with customized foam darts. The results are sample estimates for reference (your results may differ depending on materials and mod techniques used).

Sunday, September 27, 2009

Nerf Recon Mod Guide!

This Mod Guide will cover popular mods for the Nerf Recon.

Mods covered:
- Air Restrictor (AR) Removal
- Plunger Padding
- Spring Replacement

Note: These mods are also applicable to the Nerf Raider as it shares similar internal mechanisms as the Nerf Recon (some of the info here may also be repeated at the Nerf Raider Mod Guide).

>> Nerf Longshot Mod Guide
>> Nerf Raider Mod Guide

Disclaimer: Modify at your own risk. Modifications may wear out or damage your blaster. Please be careful when using hobby tools!


:: AR Removal ::

Step 1: Disassemble your Recon. Make sure to remove all the screws before detaching the casing. There are 12 screws in the main body and 2 screws in the black plunger cap.


Step 2: Take out the bolt sled assembly. Knock out the metal retaining pin that holds the bolt and bolt sled, this will separate the bolt from the bolt sled.


Step 3: This is the "Pipe Cutter" method. You will need a rotational pipe cutter to cut the bolt in order to remove the AR.

Please observe closely the spot where the pipe cutter blade is positioned at. That is the correct position to cut (though you can deviate 1mm either way). Just tighten the pipe cutter slightly and do the rotational cut (not too much or else it might slice the bolt in half).

In the following photo, a pre-sliced cut has already been made for reference.


Rotate the pipe cutter 2-3 times, and try to pull apart the bolt. If it doesn't move, rotate the pipe cutter again, do not over-tighten the pipe cutter! Keep testing. Very soon, the bolt will separate into two parts and the AR will just drop out.


Step 4: Join back the 2 sections of the bolt sleeve using plastic hobby or epoxy glue. Let the glue set properly before re-installing back into the blaster.


:: Plunger Padding ::

Without the AR, there is no air buffering system to cushion the plunger on bolt impact.

This results in very high wear and tear on the plunger, by both normal firing and dry firing. Due to repeated direct impact on the bolt (hence the loud cracking sound during firing), many users of modded Recons have experienced bolts eventually punching a hole out of the back of the plungers!

Therefore, padding should be applied to the plunger to help cushion the impact.

In the following photo, soft rubber padding is attached to the base of the plunger.


The 20mm diameter soft rubber/foam pads i used in the above example are from a brand called "Volkmar-Fix", they can be found at most common hardware shops.


Make sure to only use soft rubber pads that are easy to compress, so that it can allow the bolt to move backwards fully for proper loading/unloading of magazines and chambering of darts.

Experiment with various plunger padding methods to help maintain the durability of AR removed blasters over long-term usage.


:: Spring Replacement ::

One way to increase the speed of air delivery through the bolt is to replace the stock spring with a stronger aftermarket spring.

There are many different springs with different sizes and spring force ratings. Springs can be sourced from your local spring supply shops. Spring choice will depend on your usage.

This example below shows a stock spring (top photo) vs. an aftermarket 6kg load spring (bottom photo).


Stronger springs are usually made of thicker wires. Adjustments may have to be done as required for smooth firing operation.

Depending on the strength of the spring used, extra catch springs may also need to be added to hold the increased tension.

Note that a stronger spring will require more effort to prime the blaster before each shot, and the impact of the plunger on the bolt and overall stress on the blaster casing is also much greater. It'll be important to account for these factors when doing a spring replacement.


:: Sample Test Fire Data ::

PTG: Parallel-To-Ground (Shoulder height, no elevation)
ATG: Angled-To-Ground (Aimed higher, 30 degrees elevation)

Distance is measured at where the dart lands (Average of 6 darts).

Stock Recon
PTG = 20 ft
ATG = 30 ft

Modded Recon (AR Removal & 6kg Load Aftermarket Spring)
PTG = 50 ft
ATG = 60 ft

Note that the test was done indoors with customized foam darts. The results are sample estimates for reference (your results may differ depending on materials and mod techniques used).

Wednesday, August 12, 2009

Nerf Magstrike Mod - Enhanced Air Capacity & Improved Ammo Clips!

The Nerf Magstrike is one of the most popular blasters for nerf games, primarily because of its incredibly high rate-of-fire (RoF) when firing in both semi-auto and full auto. In addition, it uses 10-dart clips which potentially allow it to be reloaded quickly.

But the Magstrike in its stock form has a limitation in its air capacity. Most stock Magstrikes can only be pumped up around 20+ times before the over-pressure valve (OPV) activates and excess air is released.

With this limitation, it would only be able to fire 1 x Full Clip of foam darts before requiring re-pumps. In the middle of a nerf game, every second it takes to re-pump a Magstrike is a missed opportunity to engage opponents.

In addition, some Magstrike users may also experience their ammo clips sliding back down when firing in quick bursts, this results in missed shots and and wastes air pressure.

Here is how i improved my Magstrikes with some simple procedures. If you are good with hobby tools, it'll take just 15-20 minutes. :)

Step 1: Get your Magstrike (in this example, i used the Iron Man Blaster variant).


Step 2: Remove all 20 screws and open up the Magstrike. Note that the plastic cap securing the pump handle will require some effort to remove. I'd advise to use a small flat head screw driver to carefully wedge it open.
Observe the mechanisms and look at how everything works, especially the air bladder system.


Step 3: To delay the release of excess air so that the air bladder can store more air volume, lets adjust the over-pressure valve (OPV). Use a dremel or hobby knife to trim down the OPV trigger. Leave a small bit so that it can still work to release pressure (for safety).


Step 4: Here is a comparison of the air bladder size at 20 pumps (top photo) and at 30 pumps (bottom photo), notice how much additional space the air bladder needs to store more air?

Remove the white plastic cover that surrounded the air bladder, that'll give it abit more space to expand.


Step 5: We will need to create even more space for the air bladder to expand further. Note the plastic support that blocks the OPV, trim it with a dremel or hobby knife so that there is space for that section to expand into.

Remember to do the same for the other half of the Magstrike casing too!


Step 6: Now the OPV will allow more air to be pumped into the air bladder before it activates!


Step 7: Almost done, this is how the air bladder section should finally look like.


Step 8: Make sure everything is intact before closing up the casing.


Step 9: To improve the Ammo clips, apply a few layers of duct tape or e-tape to the side so that it can hold its position during burst firing.


Step 10: Pump up your Magstrike around 30-35 times and test it out with 2 x Full Clips!

Test Fire Video:


Now your Magstrike has the tactical advantage to engage opponents in nerf games with 2 x Full Clips of high RoF firepower! :)

Sunday, May 17, 2009

Foam Ballistic Shield!

Looking for some protection from foam darts?

Make your own Foam Ballistic Shield!

Foam ballistic shields can introduce more interesting tactics in nerf skirmish games, especially for indoor close-quarter-battle (CQB) games!

I've seen some shield examples online made with metal panels, wood planks or acrylic sheets, but those materials are abit too heavy to carry around and require a fair amount of craft work and tools.

My idea was to have something that is portable, light-weight, durable and easy to make... and looks cool too.

Here is how i made my foam ballistic shields with very simple materials in just 5 minutes:

Step 1: Get a car boot foam tray from your local car accessory shop. Preferably rectangular, with raised edges and in 3 feet x 2 feet dimensions.


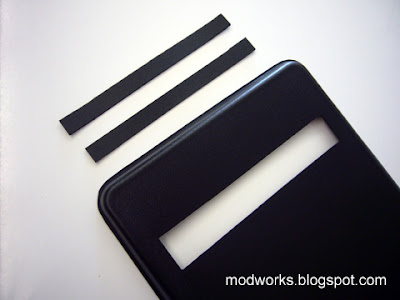
Step 2: Cut out a suitable sized view slot (can also attach a piece of clear transparency sheet to cover the view slot).

Cut the excess foam piece into 2 strips (to use as handles).


Step 3: Attach the 2 strips as handles onto the back of the foam ballistic shield using velcro (so that its adjustable for multiple users).


Final Step: Print out your favourite logo or call sign and attach it to the front of the foam ballistic shield.


A Nerf Maverick would seem to be the natural choice for nerf players equipped with a foam ballistic shield... but do note that the Nerf Maverick is a manual-action single-shot blaster.

Due to having one arm already holding the foam ballistic shield, it would be more effective to equip a semi-auto/full-auto blaster like the Nerf Magstrike or Rapid Fire 20.

On the flipside, this may also make shield equipped players abit too "overpowered" in nerf games, therefore expect organizers to set additional special rules to balance the usage of foam ballistic shields.

Anyways... when you are not using it as a foam ballistic shield for your nerf games, you could still use it as a foam tray for your car boot! :)

Friday, May 1, 2009

Buzz Bee Belt Blaster Mod - Ammo Belt Drum!

The Buzz Bee Belt Blaster is an interesting foam dart blaster with its pump-action design and 30-dart ammo belt.

But the common method of connecting it into a loop and letting the belt dangle freely while firing can be abit too obstructive and looks messy, especially when playing fast paced skirmish games that involve quick fire and movement.

Therefore, i created a custom Ammo Belt Drum for the Belt Blaster, something to keep the ammo belt secured in a container yet allowing it to cycle freely (and still look cool at the same time!).

Here is how i made my custom Ammo Belt Drum:

Step 1: Get a CD Spindle Case (8cm tall) and Velcro Strips with adhesive backings.


Step 2: Cut a hatch into the CD spindle case cover, the hatch width should ideally be 4-5 cm wide. Make sure the right side of the hatch (shown in the photo below) is left attached to the cover, this will be the hatch ramp. Also cut out the CD spindle.


Step 3: Position the ammo belt in the drum (as shown below).
It should look like this.


Step 4: Stick the Velcro Strips to the Belt Blaster and Ammo Belt Drum.


Step 5
: Attach the Ammo Belt Drum to the Belt Blaster.
Note how i wrapped the Ammo Belt over the top of the Belt Blaster's belt rotator cover.


Final Step: Locked n' loaded... Ready to deploy!


Ammo Belt Drum - Test Fire Video

Thursday, April 30, 2009

Buzz Bee Tommy 20 Mod - Increase Rate-of-Fire!

As you all know, the new Buzz Bee Tommy 20 can now fire in full-auto mode! It does this via a motorised rotating drum magazine and dart pusher mechanism which automatically push foam darts forward in sequence into its 2 fly-wheels.

There are a total of 3 electric motors:
1 x Drum Rotator/Dart Pusher motor
2 x Fly-Wheel motors

As the speed of its motors are voltage dependent, increasing the voltage feed should be able to yield quicker drum magazine rotation and dart pushing, resulting in increased rate-of-fire (RoF).

In addition, the faster spinning of its fly-wheels should also "throw" the foam darts out at a higher velocity, thereby possibly increasing the firing distance.

Here is how i tested it with some simple components:

Step 1: Get the following items from an electrical supply store.
(Nerf Vulcan modders should be familiar with such items by now!)

1 x Battery Holder (holds 8 x AA Batteries)
1 x Battery Holder Snap-on Adapter
2 x Insulated Wire Leads (Red + Black w/ Crocodile Clips)


Step 2:
Attach everything together and install the AA Batteries (in this example, i used 8 x 1.5V AA Batteries which provide 12 Volt power in total). Once again, please take note of the Positive (Red) and Negative (Black) wire leads, do not let them short-circuit!


Final Step: Remove the Buzz Bee Tommy 20's battery cover and clip the Red and Black wire leads onto the connection points (clip properly and note the wire lead colours!).


Okay, time to test it out!

Here are the Test Fire Videos of my stock vs. upgraded Buzz Bee Tommy 20s:

Buzz Bee Tommy 20 RoF - Stock 4.5 Volt Power


Buzz Bee Tommy 20 RoF - Upgraded 12 Volt Power


The stock unit had a RoF of approx. 2 rounds per second, while the upgrade unit generated a RoF of approx. 3 rounds per second. Therefore there was a 50% increase in RoF.

In the upgraded unit, the foam darts also got "thrown" out of the 2 fly-wheels at a higher velocity too, with an average increased firing distance of around 6-7 feet.

If you are confident, you can try increasing the voltage further to increase the RoF and range even more, or use other power sources such as rechargable RC car li-po batteries to do the upgrade.

Just be careful not to burn out your blaster's motors! :)

An additional note for those of you looking to get into more detail in the modding of the new Tommy 20:


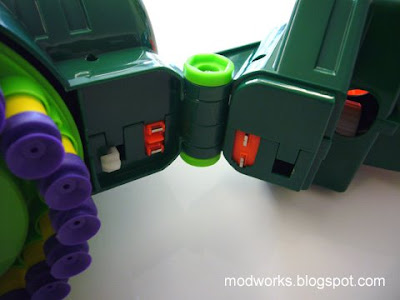
The front 2 motors powering the fly-wheels are seperated from the main body unit by a pair of electrical contacts (you can see them when you flip up the front barrel unit), therefore with additional mods, it is possible to power the drum magazine/dart pusher motor and the fly-wheel motors seperately with different power sources and voltages.

Hope we can see more mods done on the new Tommy 20! :)

Saturday, April 25, 2009

Nerf Vulcan Mod - Increase Ammo Belt Capacity!

The Nerf Vulcan's stock 25-dart ammo belt can seem abit short for such a high RoF blaster.

Lets extend them for more ammo capacity...

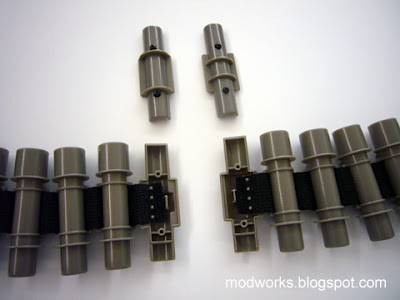
Step 1: Put the ends of 2 ammo belts side-by-side.


Step 2:
Remove the screws from each end-block. Remove the covers.


Step 3: Cut a small notch on one of the belts to fit on the other belt's clip.


Step 4:
Attach the cover back to the connected belt and install the screws back securely.


Final Step: You now have a 50-dart ammo belt!


You can keep connecting ammo belts until you get your desired ammo capacity, i'm sure some of you are already planning to go for 100-dart ammo belts!

To revert the belts back to stock 25-dart ammo belts, just reverse the process. :)