Pages

Saturday, December 4, 2010

Nerf Barricade "Clip Conversion" Mod Guide!

What if the Nerf Barricade could use N-Strike clips and mags?

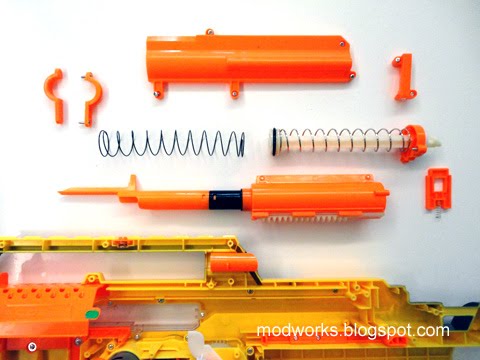
This blaster modification project is a joint development between SgNerf and pSyK (very cool Nerf enthusiast and modder at the NerfSG forum), without him this project would still be on the drawing boards.

I initially started on the project with an early prototype but pSyK was the one who developed the final design and functionality for this Barricade clip conversion mod.

Full credit goes to pSyK for his excellent design and implementation!

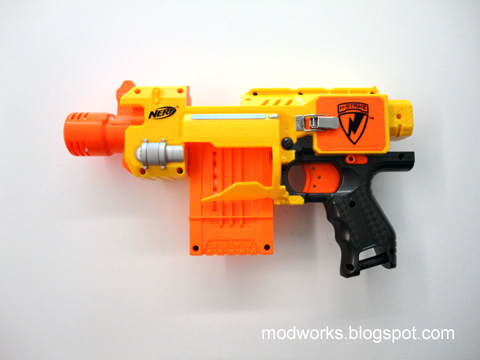
Introducing... the Nerf Barricade ECS!


Before the conversion is done, the Barricades are all modded with:
- Voltage Increase
- Trigger Activated Power On
- Flywheel Adjustment

Click this link for more information on the various performance mods: Nerf Barricade Mod Guide

Okay, here is how its converted...

- Nerf Barricade Clip Conversion Process -

Step 1:

Remove the original 10-dart turret and cut a channel at the bottom of the casing, make sure the gap is wide enough to allow a N-Strike clip to fit through properly. Cut away the turret advancement stalk too.


Step 2:

We will now create the clip securing system.

Trim off the turret advancement stem part way, this will now act as part of the clip positioning design.

In my example, i installed machine screws at positions which correspond to the clip notches and dimensions, these will be the parts that will hold the clip securely in the blaster and position it in the correct alignment.


Other materials like rubber padding or plastic bolts can also be used to create the clip securing system, just experiment and try out various methods to develop other types of clip securing system designs.


Step 3:

Trim and shape part of the casing as shown in the photo below, this will also form part of the clip securing system.


Note that this particular casing part will correspond to the shape of a notch in the front of the 6-dart clip and 18/35-dart drum mags, the 18-dart clip will need just a slight trim on it's front section to match the same notch as the rest.


Step 4:

Remove the trigger lock (found behind the trigger mechanism), this will allow the trigger to be able to be half pulled without getting stuck.

For convenience, also remove the access hatch door and lock mechanism. If you have a soldering iron, you can also remove the pressure switch and re-solder the wires back together (then you'll now have a spare pressure switch to use in other projects).


Step 5:

Add some padding on the dart pusher stem to extend its travel, this will help it to push the foam darts further into the flywheels for better contact.

Make sure the dart pusher travel is neither too long or too short, it must be just right. Keep testing until it achieves a perfect positioning.

The amount of extension padding will depend on each particular Barricade unit as individual units may differ slightly in parts fit.


Step 6:

With the clip conversion done, the dart pusher stem will need to retract much faster so that the next foam dart can advance up the clip to be ready for firing. If the dart pusher stem is too slow to retract, jams will occur.

The solution is to increase the load on the dart pusher stem's retraction spring.

Simply pull the spring back halfway and bolt it down.


Step 7:

Load in a clip and test that all the parts and components are aligned properly.

Make sure the flywheels can spin freely without obstruction. Ensure that the foam darts can be pushed forward and propelled consistently by the flywheels.


Step 8:

Assemble everything together and start running your firing tests.

Make any necessary adjustment required to achieve consistent and reliable firing performance.


Final Step:

Ditch the turrets... grab your clips and mags.

The era of clip-fed semi-auto Nerf sidearms is finally here!


Note:
- The 18-dart drum mag can also be used with this clip conversion.
- The 35-dart drum mag tends to be abit too heavy for this current conversion design, it'll need to be additionally supported when in use.

Update!
- "moddersunited" at the HvZ Forums has found another alternative method to secure the clips, check out his mod via this Link.


Nerf Barricade "Clip Conversion" - Demo & Test Fire Video!

Wednesday, October 27, 2010

Nerf Alpha Trooper - Internals Guide!

This guide will serve as a reference for the internals of the Nerf Alpha Trooper CS-18.

For a detailed review of the Nerf Alpha Trooper, click Here.

Nerf Alpha Trooper CS-18 - Internals Comparison with Nerf Raider
(Top: Raider / Bottom: Alpha Trooper)


Nerf Alpha Trooper CS-18 - Internals Comparison (Close-Up)
(Top: Raider / Bottom: Alpha Trooper)


Nerf Alpha Trooper CS-18 - Plunger & Spring Comparison with Nerf Raider
(Top: Raider / Bottom: Alpha trooper)


Friday, October 8, 2010

Custom Weighted Foam Darts - Tip Seal Guide!

I have been receiving many queries on custom weighted foam darts from modders. This guide will answer 2 of the popular questions:

How to ensure dart tips never split or detach during firing or impact?

How to make consistent flat tips for attaching the soft padding?

Here is one of the methods i use...


From left to right (top row):

- Remove the original tip from the foam dart.

- Insert the tip weight.

- Use a short section of 17/32" brass tube as a mold and sleeve it over the foam dart tip, allow 1-2mm of clearance from the brass tube edge.

- Apply hot glue into the brass tube mold, this will seal the tip weight and the foam dart together.

From left to right (bottom row):

- Put the mold tip first on a cool surface and press down on the foam dart to compress the hot glue and get rid of any bubbles. This will create a molded flat tip. Wait around 20-30 seconds for the hot glue to cool down and solidify.

- Remove the foam dart from the brass tube mold, trim the sides of the flat hot glue tip so that it is aligned with the foam dart outer diameter.

- For safety, attach a piece of soft padding to the flat hot glue tip. This helps to absorb the foam dart impact.

- Close-up of the completed custom weighted foam dart.

Hope that helps! :)

Saturday, September 25, 2010

Nerf Barricade - Mod Guide!

This Mod Guide will cover some performance mods for the Nerf Barricade.

Mods covered:
- Voltage Increase
- Trigger Activated Power On
- Flywheel Width Adjustment
- Stefan Compatibility

Disclaimer: Modify at your own risk. Modifications may wear out or damage your blaster. Please be careful when using hobby tools!


:: Voltage Increase ::

As the Barricade is a flywheel based blaster, the faster the flywheel motors spin the faster foam darts get fired out, hence longer range and faster dart velocity.

To increase the speed of the motors, simply increase the voltage feed.


In my examples, i use 14500 size 3.7V Li-Ion Rechargeable Batteries (Brand: TrustFire / Unprotected versions) in my modded Barricades. The batteries can be sourced from specialist electronics stores or online sites.

14500 size 3.7V Li-Ion TrustFire rechargeable batteries are usually charged up to 4.2V, so i use 2 of them with a dummy AA battery in the 3rd battery slot. This configuration provides 8.4 Volts of power to the Barricade's motors.


With 8.4 Volts of power, the Barricade's motors spin much faster and the start-up response time is also quicker.

See the test fire video below for the range results based on this increased voltage.

I have also tested it with 3 x fully charged unprotected TrustFire Li-Ion rechargeable batteries with a total of 12.6 Volts, but the motors did not move. Therefore, it seems that 12.6 Volts from unprotected Li-Ion batteries is perhaps over the limits of its inbuilt safety thermistor, due to the higher discharge rates and voltage of these batteries.

Note that normal Alkaline batteries have limited discharge rates, and may therefore perform differently at the same voltage compared to these unprotected TrustFire Li-Ion batteries.


:: Trigger Activated Power On ::

Stock Barricades require their motors to be separately switched on, then constantly running to be able to fire.... but the motors will still be spinning even when its not firing anything!

This creates an incredibly annoying constant buzzing sound that has put off many players from using Barricades, not to mention the added power drain on the batteries.

I've worked out a way to solve this issue by installing a pressure switch which would be activated by the trigger pull instead.

Interestingly, the stock Nerf Barricade already has a pressure switch included for modders to use... its just under the original On/Off switch!


Step 1: Open the internal cover to the On/Off switch and you will find a pressure switch. Remove it and detach it from the circuit.


Step 2: Locate the area directly under the trigger, cut a slot around the size of the pressure switch and make sure it is aligned so that the trigger will be able to slide properly over the pressure switch.

Use the cut-out piece of plastic to make a ledge, this will serve as a holder for the pressure switch.


Step 3: Glue the pressure switch onto the plastic ledge and make sure it is positioned properly to allow the trigger to slide over it and depress the switch smoothly.

Connect the pressure switch to the circuit with some additional wiring.


Solder all the parts and wires together and wrap electrical tap on all exposed wiring.

This is how the new circuit should look like.


Thats it! Now your Barricade motors will only spin when you want to fire it.

The key to efficient usage is to simply pull the trigger a quarter way to get the motors spinning. As the motors start-up response time is much faster at higher voltage feeds, its just a split second before you can fire shots continuously.

With abit of practice, you'll be able to use it as a quick draw sidearm!

After firing, just release the trigger and the motors will stop spinning. No more constant buzzing when not firing! :)

Although the original On/Off switch is now no longer functional, it still acts as a useful trigger "safety" lock. So you can slide it forward to prevent accidental trigger pulls.


:: Flywheel Width Adjustment ::

For modders who want to use other types of foam darts, especially those which have narrower tips (ie. streamlines or stefans), one solution is to adjust the width of the flywheels.

In my example, i simply use electrical tape to increase the width of the flywheels.

The amount of tape layers required will depend on the foam darts used, so its up to modders to test and find the best combination of tape layers to apply.


Note that the plastic casings and ramps around the flywheels would need to be trimmed if thicker layers of material are wrapped around the flywheels, or else the wheels may get stuck.


:: Stefan Compatibility ::

For modders who want to use stefans or foam darts that are much shorter than normal stock foam darts, here is an idea you can try.

Slot separate foam spacer pieces in the barrels behind each stefan or short foam dart. The Barricade's dart pusher rod will push the foam spacer piece which in turn will push the stefan forward into the flywheels to be fired out.


:: Modified Nerf Barricade - Demo & Range Testing Video ::

Here is a demo and range testing video for reference.


:: Sample Test Fire Data ::

PTG: Parallel-To-Ground (Shoulder height, no elevation)
ATG: Angled-To-Ground (Aimed higher, 30 degrees elevation)

Distance is measured at where the dart lands (Average of 10 darts).

Stock Barricade
PTG = 25 ft
ATG = 35 ft

Modded Barricade (8.4 Volts & Trigger Activated Power On)
PTG = 50 ft
ATG = 60 ft

Note that the tests were done under controlled conditions with stock Nerf Sonic foam darts. The results are sample estimates for reference (your results may differ depending on materials and mod techniques used).

Tuesday, September 21, 2010

Nerf Stampede - Plunger Catch Control Spring Troubleshoot!

Credit goes to Spartan at the NerfSG forum for detecting and solving this issue.

Some users who have modded their Nerf Stampedes may have encountered an odd issue whereby their blasters continue firing even after they release the trigger, resulting in erratic firing operation... or the bolt moving to and fro but the catch not releasing at all.

Here is a possible cause of this phenomenon:


The Stampede's Plunger Catch Control Spring has somehow popped out of position and no longer functions properly.

The solution is to remove the catch control component and reposition the spring back to its original position, then install it back into the Stampede.


Applying some tape to cover the gaps can also help prevent the spring from popping out again too.

This should help solve the Stampede's "auto-running" or erratic firing issues... or at least narrow down the causes. :)

Saturday, September 18, 2010

Nerf Stampede - Battery Sled "Quick-Release Catch" Mod!

Ever wished you could do away with using a precision screwdriver every time the Stampede's battery sled needs to be opened?

Especially for those of us modders who use higher voltage but lower capacity Li-Ion rechargeable batteries and need to frequently access the battery sled.

Here is an excellent functional mod from fellow Nerf enthusiast and modder irfanzain... the Nerf Stampede battery sled "Quick-Release Catch" Mod!

Check out his forum threads on this modification at NerfSG and NerfHaven. Full credits got to irfanzain for his simple yet efficient idea and design! :)

Here is an example of a set of quick-release catches that i've installed on one of my modded Nerf Stampedes:

Nerf Stampede - Battery Sled "Quick-Release Catch" Mod


Quick-release catches can be sourced from most major hardware stores and shops.

Yeah, i'm definitely installing quick-release catches on all my modded Stampedes!

Thursday, September 16, 2010

Nerf Barricade - Internals Guide!

This guide will serve as a reference for the internals of the Nerf Barricade RV-10.

For a detailed review of the Nerf Barricade, click Here.

Nerf Barricade RV-10 - Disassembled


Nerf Barricade RV-10 - Flywheel System Detail


Nerf Barricade RV-10 - Motor Comparison with Tamiya Plasma Dash Motor

Wednesday, September 15, 2010

More Blaster Protection Cases!

As readers may have seen in my earlier post on Blaster Protection Cases which could fit blasters like Longshots or +bows... they worked well, but that version was just slightly too small for the Nerf Stampede.

Good News! I've managed to get larger protection cases that can fit the Nerf Stampede!


Yeah... Stampede players can now arrive in pro-style too!

Friday, September 10, 2010

Nerf Stampede Mod Guide!

This Mod Guide will cover some performance mods for the Nerf Stampede.

Mods covered:
- Air Restrictor (AR) Removal
- Plunger Rod Air Release Seal
- Plunger Padding
- O-Ring Replacement
- Voltage Increase
- Aftermarket Spring Replacement

Disclaimer: Modify at your own risk. Modifications may wear out or damage your blaster. Please be careful when using hobby tools!


:: AR Removal ::

Step 1: Disassemble your Stampede. Make sure to remove all the screws before detaching the casing.


Step 2: Disassemble the plunger mechanism components and remove the plunger rod from the plunger casing.


Step 3: Use long screwdrivers and a hammer, carefully knock out the Air Restrictor (AR) assembly from both ends of the plunger and bolt.


Left Photo: Stock Air Restrictor / Right Photo: Air Restrictor Removed.


:: Plunger Rod Air Release Seal ::

Look at the front and back of the plunger tip, notice the 2 air release holes?
For a better air seal, use super glue or epoxy glue to seal both of them.


:: Plunger Padding ::

Without the AR, there is no air buffering system to cushion the plunger on bolt impact.

This results in very high wear and tear on the plunger and bolt casing, by both normal firing and dry firing. Due to repeated direct impacts on the bolt (hence the loud cracking sound during firing) over time, the bolt and plunger may become damaged.

Therefore, padding should be applied to the plunger to help cushion the impact.

In the following photo, i attached a 20mm diameter soft bumper padding to the tip of the plunger.


The 20mm diameter soft bumper pads i used in the above example are from a brand called "Volkmar-Fix", they can be found at most common hardware shops.


:: O-Ring Replacement ::

To test the plunger air seal, block the bolt exit and try to push the plunger rod into the plunger casing, if the air seal is optimized, there should be some resistance in the plunger. It should still be able to move smoothly when the bolt exit is not blocked.

If the plunger seal is loose, simply replace the stock o-ring with a more air-tight aftermarket o-ring.

From my experience, the plungers in different Stampede units can differ slightly in diameter, therefore you will have to test various o-rings to find the ideal ones that fit properly for an air-tight seal.

Photo Left: Aftermarket O-Ring / Photo Right: Stock O-Ring


:: Voltage Increase ::

The voltage feed to the Stampede's motor determines its speed and torque.

To increase the Stampede's Rate of Fire (RoF), simply increase the amount of voltage to its motor.

In my examples, i choose to use 14500 size 3.7V Li-Ion Rechargeable Batteries (Brand: TrustFire / Unprotected versions) for all modded Stampedes.

I prefer to use these type of battery sizes due to their versatility in usage. Because of their AA compatible size, they can fit into multi-slot AA battery holders, and are not just limited to specific hobby or modding usage, they can also be used other devices like CREE torch lights or even to replace normal batteries in compact electronics devices (with proper voltage matching).

Such batteries can be installed in the original Stampede battery sled without additional modification, simply use AA or 2AA to D-battery converters, or use multi-slot AA battery holders.


14500 size 3.7V TrustFire unprotected Li-Ion rechargeable batteries can be charged up to 4.2V each, so i use 4 of them in a 4AA battery holder to get around 16.8V of power.


Notice how little space these rechargeable batteries require. :)

These 14500 size Li-Ion rechargeable batteries are compact and lightweight. Although their 900mAh capacity are low compared to other batteries, i've tested sets at full charge and have managed to fire around 40 x 18-dart clips worth of foam darts before the battery sets require recharging.

That's more than 700+ shots per charge, more than enough for most Nerf games.

As a reserve, i usually just carry an extra spare set for extended Nerf games or when the first set is recharging.


:: Aftermarket Spring Replacement ::

One way to increase the speed of air delivery through the bolt is to replace the stock spring with a stronger aftermarket spring.

There are many different springs with different sizes and spring force ratings. Spring choice will depend on your usage.

The examples below show the stock spring compared with 3 other aftermarket springs.

Photo (Left-Right): Stock Spring, 6kg load Spring, 9kg load Spring, 13kg load Spring.


Tested effects and usage of the various aftermarket springs shown above:
6kg load Spring
- Works with 9V but RoF will be reduced by 50%, recommend >12V for better RoF.

9kg load Spring- 9V has difficulty moving the plunger, 12V gets normal RoF, recommend >15V for better RoF.
13kg load Spring - 12V has difficulty moving the plunger, 15V gets normal RoF, recommend >18V for better RoF.

Note that the above voltages are tested with TrustFire 14500 unprotected Li-Ion rechargeable batteries. These unprotected Li-Ion batteries have high discharge rates which are necessary to provide the required torque to the motor to handle heavier spring loads.

Be advised that protected versions or regular Alkaline batteries may not have high enough discharge rates (separate factor from voltage) to enable the motor to pull such heavier spring loads.

For an optimal balance of RoF, range and reliability, i currently use 9kg load aftermarket springs with 16.8V power on my modded Stampedes.

Photo Top: Stock Spring / Photo Bottom: 9kg load Spring


:: Modified Nerf Stampede - Test Fire & Range Testing Video ::

All the above modifications will result in this...


:: Sample Test Fire Data ::

PTG: Parallel-To-Ground (Shoulder height, no elevation)
ATG: Angled-To-Ground (Aimed higher, 30 degrees elevation)

Distance is measured at where the dart lands (Average of 6 darts).

Stock Stampede
PTG = 20 ft
ATG = 30 ft

Modded Stampede (AR Removal & 6kg Load Aftermarket Spring)
PTG = 45 ft
ATG = 60 ft

Modded Stampede (AR Removal & 9kg Load Aftermarket Spring)
PTG = 60 ft
ATG = 75 ft

Modded Stampede (AR Removal & 13kg Load Aftermarket Spring)
PTG = 70 ft
ATG = 85 ft

Note that the tests were done under controlled conditions with customized foam darts. The results are sample estimates for reference (your results may differ depending on materials and mod techniques used).

Saturday, September 4, 2010

Nerf Stampede - RoF & Test Fire Update!

Here is an update to the Nerf Stampede Voltage Increase and RoF Testing.

I have test fired more clips and have found that voltages of above 20 Volts produce way too high a rate-of-fire to be able to reliably chamber foam darts from clips and magazines. Although some clips might be able to fire properly once in a while, the majority of clips will get jammed easily very often. Just a slight delay in dart advancement or a bent dart can cause jams to occur.

Testing with 18 Volts provided more manageable speeds, the rate of jams occurring is less but it still happens, especially when worn-out foam darts happen to get stuck in the clips. Not a good situation to be in during a Nerf game!

Overall, i've found 15-16 Volts to be just right in terms of improved rate-of-fire, yet with smooth operation and low chances of jams occurring, even when slightly bent or damaged darts are used. Therefore, i'd recommend using 15-16 Volts for reliable operation in modded Stampedes.

With that note... here is a Clip Reload & Test Fire video of a modded Nerf Stampede running on 15 Volts.

Friday, September 3, 2010

Blaster Protection Case!

Looking for an alternative to chucking your valuable blasters into a large bag and finding out later that they have been scratched up and full of scuffed marks en route to and from Nerf games?

Well, check this out... go all "professional" to Nerf games with a cool Blaster Protection Case!


Arrive at Nerf games in ultimate pro-style! :)

Wednesday, September 1, 2010

Nerf Stampede - Voltage Increase / RoF Testing (Work-In-Progress)

With the Nerf Stampede now available in stores, i've managed to get alot more sets to tinker and modify. I will be posting up a series of Mod Guides on the Nerf Stampede soon.

In the meantime, here is a glimpse at how increases in voltage affect the Stampede's Rate-of-Fire (RoF).

Important Disclaimer: DO NOT attempt this modification unless you are familiar with electrical circuits and accept if your blaster is damaged in the process! Modify at your own risk!


UPDATE!

Refer to this follow-up link below for the test results and optimal RoF recommendations:

Link: http://modworks.blogspot.com/2010/09/nerf-stampede-rof-test-fire-update.html


Thursday, August 12, 2010

Nerf Spectre - Internals Guide!

This guide will serve as a reference for the internals of the Nerf Spectre REV-5.

For a detailed review of the Nerf Spectre, click Here.

Nerf Spectre REV-5 - Disassembled


Nerf Spectre REV-5 - Internals Comparison with Nerf Maverick
(Top: Maverick / Bottom: Spectre)


Nerf Spectre REV-5 - Plunger & Spring Comparison with Nerf Maverick
(Top: Maverick / Bottom: Spectre)