Just to share some systems that i've tested with air tank blasters... hopefully it can also be a useful reference for modders.
Here are 2 demo videos which show possible setups that can be incorporated into various air tank blaster mods.
Safety Valve System - Parts Demo
System Parts: - Topeak Pump (Mini Dual G)
- Pressure Gauge
- Adjustable Pressure Release Safety Valve
- Nerf Air Tech 3000 (AT3K) Air Tank Assembly
- M6 size Pressure Rated Air Hoses
- M6 size Pressure Rated Quick Release Couplers
You'll notice in the video that i'm using a Topeak Mini Dual G (2-stage/double-action) Bike Pump, it has a max. pressure rating of 120 PSI and it only took me 2 easy pumps to reach 50 PSI with the AT3K air tank (a magstrike pump would have required 6-7 pumps to reach that PSI).
Thats one of the reasons why i had to install a safety valve in my modded AT3K units, 'cos the pump effort is so easy and light that i sometimes accidentally put extra pumps into it and end up exceeding 100 PSI, which makes the trigger so difficult to pull that i had to open the casing to disconnect the air hose just to manually release the excess air pressure. With the safety valve i can set the limits or vent the pressure externally.
Anyways, after trying out various replacement pumps, i now use the Topeak Pumps for all my modded AT3Ks, it allows the blaster to operate at a much higher RoF and with alot less effort, so i recommend it (or similiar high pressure rated double-action bike pumps) for any modder who is looking for a similiar combo.
Here is what an early setup looked like (before i installed the safety valve, which is positioned at where the goo gauge used to be):
TP3k = Topeak 3k. :)
--
Constant Pressure Air Feed System - Parts Demo
System Parts: - Topeak Pump (Mini Dual G)
- Pressure Gauge
- Adjustable Air Flow Control Valve
- Rubber Air Bladder (From Nerf RF20)
- Nerf Air Tech 3000 (AT3K) Air Tank Assembly
- M6 size Pressure Rated Air Hoses
- M6 size Pressure Rated Quick Release Couplers
For this system, its similiar to what some modders have already previously done with their "semi-auto" mods, in my example i'm using an Adjustable Air Flow Control Valve to slow down the speed of the air refill from the rubber air bladder and the AT3K air tank. The air flow valve can be adjusted larger, so that the refill will be faster in between shots, but it'll also use up more air due to the increased flow leakage during firing.
Note that the constant pressure is derived from the rubber air bladder (not the air flow control valve).
Btw, all the pressure rated components i used in these setups are sourced from my local pneumatic equipment parts supply shops... i guess you can find similiar parts quite easily from online sites too.
.
Mods covered: - Voltage Increase - Trigger Activated Power On - Flywheel Grip Improvement
Disclaimer: Modify at your own risk. Modifications may wear out or damage your blaster. Please be careful when using hobby tools!
:: Voltage Increase :: As the Photon Storm is a flywheel based blaster, the faster the flywheel motors spin the faster foam darts get fired out, hence longer range and faster dart velocity.
To increase the speed of the motors, simply increase the voltage feed.
In my examples, i use 14500 size 3.7V Li-Ion Rechargeable Batteries (Brand: TrustFire / Unprotected versions) in my modded Photon Storms. The batteries can be sourced from specialist electronics stores.
14500 size 3.7V Li-Ion TrustFire rechargeable batteries are usually charged up to 4.2V, so i use 3 of them with dummy AA batteries in the remaining battery slots. This configuration provides 12.6 Volts of power to the Photon Storm's motors.
With 12.6 Volts of power, the Photon Storm's motors spin much faster and the start-up response time is also quicker.
I have also tested it with 4 x and 5 x fully charged unprotected TrustFire Li-Ion rechargeable batteries with a total of 16.8 Volts and 21 Volts respectively, the motors spin even faster but it seems to be too fast for the foam darts i used as they tend to spiral out of control or tumble in flight at those faster flywheel speeds. Modders will just have to test and see what speeds suit their foam darts.
Note that conventional Alkaline batteries have more limited discharge rates, and will therefore perform differently at the same voltage compared to these unprotected TrustFire Li-Ion batteries.
:: Trigger Activated Power On ::
Stock Photon Storms require their motors to be separately switched on, then constantly running to be able to fire.... so the motors will still be spinning even when its not firing anything.
This creates an annoying constant buzzing sound, along with the added power drain on the batteries too.
One way to solve this issue is by installing a pressure switch that is activated by the trigger pull instead.
Step 1: Open the casing and locate the the wiring that links the battery compartment and the motors.
You can choose either the red or black wire (i use the black wire). Simply cut that wire above where the tip of the "dart pusher"stalk is situated.
Get a push-to-on pressure switch that utilizes a flip/rocker action, you can source these from electronics parts supply shops.
Step 2: Solder the wiring to the push-to-on pressure switch (i added some electrical tape to further prevent the soldered connections from accidentally shorting).
Glue the pressure switch to the plastic shelf just above the "dart pusher" stalk.
Its done!
:: Flywheel Grip Improvement ::
As an optional mod, electrical or rubber tape can be wrapped around the flywheels to increase their grip for better contact with the foam darts. This can help improve performance if matched with the right foam darts.
The amount of tape layers required will depend on the foam darts used, so its up to modders to test and find the best combination of tape layers to apply.
Note that the tape needs to be applied evenly and in an equal amount (ie. both flywheels must have the exact same amount of tape material with no bumps), or else they may result in unbalanced flywheel speed and timing.
Distance is measured at where the dart lands (Average of 12 darts).
Stock Photon Storm PTG = 25 ft ATG = 30 ft
Modded Photon Storm (12.6 Volts & Trigger Activated Power On) PTG = 50 ft ATG = 60 ft
Note that the tests were done under controlled conditions with custom calibrated foam darts. The results are sample estimates for reference (your results may differ depending on materials and mod techniques used).
The following write-up will look at changing the ERTL Rapid Fire Shotgun (RFSG) original kid-sized brown shoulder stock to a more practical M4 shoulder stock.
For those who are keen to know more about Doomsayers (modded RFSG), you can read the original mod guide by Forsaken_angel24 at the NerfHaven forum:
Note that there are many methods to do shoulder stock mods on blasters, this isn't the only (or best) way, its just something i tested and worked.
Step 1:
Get your choice of replacement shoulder stock. In my case, i got a plastic replica adjustable M4 shoulder stock.
Step 2:
Use a dremel or handsaw to cut away the back portion of the RFSG, in my example i cut it at the section with the largest opening.
Ignore the 2 black pieces of plastic in the photo, its just some spare bits from part of the cut out section that i figured could be useful to cover gaps. Didn't get to use them eventually.
Step 3:
Measure and nest a length of 13mm SingaPlastics PVC pipe inside a shorter length of 16mm PVC pipe, this will become the connection point.
Open up the replacement shoulder stock and position a 13mm PVC end-cap inside, you'll have to trim and sand down the shoulder stock internals until it fits.
Step 4:
Bolt on the connection point pipes to the RFSG shell, i used 2 countersunk machine screws to secure it to the shell. Note that the shell is in 2 layers, so i bolted it to the inner layer.
Step 5:
Drill and sand out the replacement shoulder stock until it has a rounded opening to accept the connection point pipes, then glue the 13mm PVC end-cap permanently inside the replacement shoulder stock. I also added a ring of foam padding to help cover the gaps between the shoulder stock and casing.
Assemble everything back together and connect the new shoulder stock, its complete!
The plastic replica M4 shoulder stock i used is adjustable so it could be extended to different positions. Much more comfortable and steadier when shoulder aiming.
One of the main reasons why i did this mod was also because the Doomsayer was originally too long and it could not fit into any of my carrying cases or bags! I was getting sick of carrying it around in plastic bags with all the barrels sticking out! :)
With the shoulder stock being removable, it can now fit nicely into a large padded case.
Gaps covered by assorted bits and pieces from chopped out parts (guess which parts the bits came from?).
Retained shoulder stock.
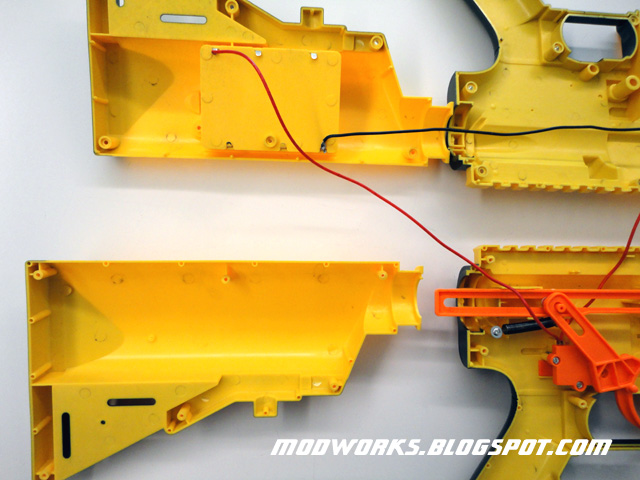
Relocated battery pack. It houses 4 x fully charged 14500-size TrustFire Li-Ion rechargeable batteries (unprotected versions) which output a total of 16.8V.
And this is what i call... the "SpamFire" Combo! :)