Pages

Showing posts with label Barricade. Show all posts

Saturday, December 4, 2010

Nerf Barricade "Clip Conversion" Mod Guide!

What if the Nerf Barricade could use N-Strike clips and mags?

This blaster modification project is a joint development between SgNerf and pSyK (very cool Nerf enthusiast and modder at the NerfSG forum), without him this project would still be on the drawing boards.

I initially started on the project with an early prototype but pSyK was the one who developed the final design and functionality for this Barricade clip conversion mod.

Full credit goes to pSyK for his excellent design and implementation!

Introducing... the Nerf Barricade ECS!
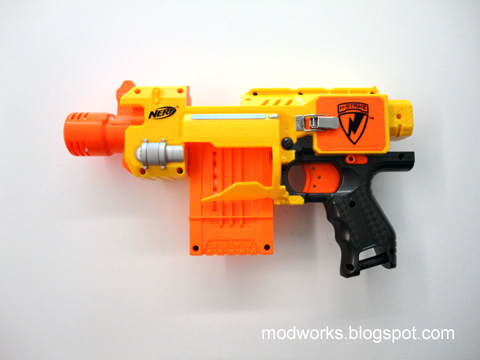


Before the conversion is done, the Barricades are all modded with:
- Voltage Increase
- Trigger Activated Power On
- Flywheel Adjustment

Click this link for more information on the various performance mods: Nerf Barricade Mod Guide

Okay, here is how its converted...

- Nerf Barricade Clip Conversion Process -

Step 1:

Remove the original 10-dart turret and cut a channel at the bottom of the casing, make sure the gap is wide enough to allow a N-Strike clip to fit through properly. Cut away the turret advancement stalk too.


Step 2:

We will now create the clip securing system.

Trim off the turret advancement stem part way, this will now act as part of the clip positioning design.

In my example, i installed machine screws at positions which correspond to the clip notches and dimensions, these will be the parts that will hold the clip securely in the blaster and position it in the correct alignment.


Other materials like rubber padding or plastic bolts can also be used to create the clip securing system, just experiment and try out various methods to develop other types of clip securing system designs.


Step 3:

Trim and shape part of the casing as shown in the photo below, this will also form part of the clip securing system.


Note that this particular casing part will correspond to the shape of a notch in the front of the 6-dart clip and 18/35-dart drum mags, the 18-dart clip will need just a slight trim on it's front section to match the same notch as the rest.


Step 4:

Remove the trigger lock (found behind the trigger mechanism), this will allow the trigger to be able to be half pulled without getting stuck.

For convenience, also remove the access hatch door and lock mechanism. If you have a soldering iron, you can also remove the pressure switch and re-solder the wires back together (then you'll now have a spare pressure switch to use in other projects).


Step 5:

Add some padding on the dart pusher stem to extend its travel, this will help it to push the foam darts further into the flywheels for better contact.

Make sure the dart pusher travel is neither too long or too short, it must be just right. Keep testing until it achieves a perfect positioning.

The amount of extension padding will depend on each particular Barricade unit as individual units may differ slightly in parts fit.


Step 6:

With the clip conversion done, the dart pusher stem will need to retract much faster so that the next foam dart can advance up the clip to be ready for firing. If the dart pusher stem is too slow to retract, jams will occur.

The solution is to increase the load on the dart pusher stem's retraction spring.

Simply pull the spring back halfway and bolt it down.


Step 7:

Load in a clip and test that all the parts and components are aligned properly.

Make sure the flywheels can spin freely without obstruction. Ensure that the foam darts can be pushed forward and propelled consistently by the flywheels.


Step 8:

Assemble everything together and start running your firing tests.

Make any necessary adjustment required to achieve consistent and reliable firing performance.


Final Step:

Ditch the turrets... grab your clips and mags.

The era of clip-fed semi-auto Nerf sidearms is finally here!


Note:
- The 18-dart drum mag can also be used with this clip conversion.
- The 35-dart drum mag tends to be abit too heavy for this current conversion design, it'll need to be additionally supported when in use.

Update!
- "moddersunited" at the HvZ Forums has found another alternative method to secure the clips, check out his mod via this Link.


Nerf Barricade "Clip Conversion" - Demo & Test Fire Video!

Saturday, September 25, 2010

Nerf Barricade - Mod Guide!

This Mod Guide will cover some performance mods for the Nerf Barricade.

Mods covered:
- Voltage Increase
- Trigger Activated Power On
- Flywheel Width Adjustment
- Stefan Compatibility

Disclaimer: Modify at your own risk. Modifications may wear out or damage your blaster. Please be careful when using hobby tools!


:: Voltage Increase ::

As the Barricade is a flywheel based blaster, the faster the flywheel motors spin the faster foam darts get fired out, hence longer range and faster dart velocity.

To increase the speed of the motors, simply increase the voltage feed.


In my examples, i use 14500 size 3.7V Li-Ion Rechargeable Batteries (Brand: TrustFire / Unprotected versions) in my modded Barricades. The batteries can be sourced from specialist electronics stores or online sites.

14500 size 3.7V Li-Ion TrustFire rechargeable batteries are usually charged up to 4.2V, so i use 2 of them with a dummy AA battery in the 3rd battery slot. This configuration provides 8.4 Volts of power to the Barricade's motors.


With 8.4 Volts of power, the Barricade's motors spin much faster and the start-up response time is also quicker.

See the test fire video below for the range results based on this increased voltage.

I have also tested it with 3 x fully charged unprotected TrustFire Li-Ion rechargeable batteries with a total of 12.6 Volts, but the motors did not move. Therefore, it seems that 12.6 Volts from unprotected Li-Ion batteries is perhaps over the limits of its inbuilt safety thermistor, due to the higher discharge rates and voltage of these batteries.

Note that normal Alkaline batteries have limited discharge rates, and may therefore perform differently at the same voltage compared to these unprotected TrustFire Li-Ion batteries.


:: Trigger Activated Power On ::

Stock Barricades require their motors to be separately switched on, then constantly running to be able to fire.... but the motors will still be spinning even when its not firing anything!

This creates an incredibly annoying constant buzzing sound that has put off many players from using Barricades, not to mention the added power drain on the batteries.

I've worked out a way to solve this issue by installing a pressure switch which would be activated by the trigger pull instead.

Interestingly, the stock Nerf Barricade already has a pressure switch included for modders to use... its just under the original On/Off switch!


Step 1: Open the internal cover to the On/Off switch and you will find a pressure switch. Remove it and detach it from the circuit.


Step 2: Locate the area directly under the trigger, cut a slot around the size of the pressure switch and make sure it is aligned so that the trigger will be able to slide properly over the pressure switch.

Use the cut-out piece of plastic to make a ledge, this will serve as a holder for the pressure switch.


Step 3: Glue the pressure switch onto the plastic ledge and make sure it is positioned properly to allow the trigger to slide over it and depress the switch smoothly.

Connect the pressure switch to the circuit with some additional wiring.


Solder all the parts and wires together and wrap electrical tap on all exposed wiring.

This is how the new circuit should look like.


Thats it! Now your Barricade motors will only spin when you want to fire it.

The key to efficient usage is to simply pull the trigger a quarter way to get the motors spinning. As the motors start-up response time is much faster at higher voltage feeds, its just a split second before you can fire shots continuously.

With abit of practice, you'll be able to use it as a quick draw sidearm!

After firing, just release the trigger and the motors will stop spinning. No more constant buzzing when not firing! :)

Although the original On/Off switch is now no longer functional, it still acts as a useful trigger "safety" lock. So you can slide it forward to prevent accidental trigger pulls.


:: Flywheel Width Adjustment ::

For modders who want to use other types of foam darts, especially those which have narrower tips (ie. streamlines or stefans), one solution is to adjust the width of the flywheels.

In my example, i simply use electrical tape to increase the width of the flywheels.

The amount of tape layers required will depend on the foam darts used, so its up to modders to test and find the best combination of tape layers to apply.


Note that the plastic casings and ramps around the flywheels would need to be trimmed if thicker layers of material are wrapped around the flywheels, or else the wheels may get stuck.


:: Stefan Compatibility ::

For modders who want to use stefans or foam darts that are much shorter than normal stock foam darts, here is an idea you can try.

Slot separate foam spacer pieces in the barrels behind each stefan or short foam dart. The Barricade's dart pusher rod will push the foam spacer piece which in turn will push the stefan forward into the flywheels to be fired out.


:: Modified Nerf Barricade - Demo & Range Testing Video ::

Here is a demo and range testing video for reference.


:: Sample Test Fire Data ::

PTG: Parallel-To-Ground (Shoulder height, no elevation)
ATG: Angled-To-Ground (Aimed higher, 30 degrees elevation)

Distance is measured at where the dart lands (Average of 10 darts).

Stock Barricade
PTG = 25 ft
ATG = 35 ft

Modded Barricade (8.4 Volts & Trigger Activated Power On)
PTG = 50 ft
ATG = 60 ft

Note that the tests were done under controlled conditions with stock Nerf Sonic foam darts. The results are sample estimates for reference (your results may differ depending on materials and mod techniques used).

Thursday, September 16, 2010

Nerf Barricade - Internals Guide!

This guide will serve as a reference for the internals of the Nerf Barricade RV-10.

For a detailed review of the Nerf Barricade, click Here.

Nerf Barricade RV-10 - Disassembled


Nerf Barricade RV-10 - Flywheel System Detail


Nerf Barricade RV-10 - Motor Comparison with Tamiya Plasma Dash Motor